


wordpress カスタムフィールドを使いやすくするプラグインCustom Field Gui Utility 2011年2月11日
Tag:カスタムフィールド | プラグイン
WEB制作で欠かせないのがカスタマイズ!クライアントの要望に応じて毎度頭を悩ませるもの!そんな中カスタマイズには必須ともいえるカスタムフィールド!wpのデフォルトでもカスタムフィールドは使用できますが、これが何とも使いにくい・・・
それならばインターフェイスを改善してくれるプラグイン「Custom Field Gui Utility」を導入!これでカスタマイズの幅がぐ~んと広がります。
1.まずはCustom Field Gui Utilityをダウンロードします。
ダウンロードしたファイルを解凍し、/wordpress/wp-content/pluginsフォルダにupロード。
管理画面でプラグインを有効化します。
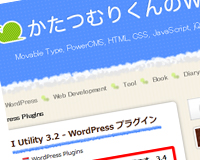
custom-field-gui-utilityの詳しい内容はプラグイン元かたつむりくんのWWWさんの所で詳しく説明されていますのでそちらを参考にして下さい。
2.さて、設定したcustom-field-gui-utilityをwordpressのテンプレートにどう組み込むのかの説明です。
最近では企業様などからの制作依頼で、納品後は自社で更新したいと言われるお客様が多いのですが、タグやcssが解らないお客様でも投稿ページで入力したテキストや画像を毎回同じレイアウトで表示出来る様にしてあげればレイアウトが崩れる事もなく安心して更新して頂けます。
3.ではいよいよカスタマズ!
まずカスタマイズするテンプレートを用意します。いろんなパターンのレイアウトが必要な場合はデフォルトのsingle.phpをコピーしカスタマイズ用のテンプレートを作ります。詳しくはsingle.phpのテンプレートを切り替える方法をご覧ください
作成したテンプレートをここでは例としてsample.phpとします。
本文を表示するにはthe_contentタグを使用しますが、例えば本文の下にカスタムフィールドで指定した画像やテキストを表示したい場合
<div class="asset-body">
		<?php the_content(); ?> 本文
		</div>
<dl>
<dt><?php echo post_custom('imagefield1'); ?>  </dt> 画像
 <dd>?php echo post_custom('textarea1'); ?></dd> テキストエリア
</dl>
4.カスタムフィールドに画像の投稿や記事が無い場合、タグを残さない様に表示する方法
<div class="asset-body">
		<?php the_content(); ?> 本文
		</div>
<dl>
<?php if(post_custom('imagefield1')):?>
<dt><?php echo post_custom('imagefield1'); ?>  </dt> 画像
<?php endif;?>
<?php if(post_custom('textarea1')):?>
 <dd>?php echo post_custom('textarea1'); ?></dd> テキストエリア
<?php endif;?>
</dl>
5.カスタムフィールドを使ってサムネイル画像をlightboxで表示する方法<
<div class="asset-body">
		<?php the_content(); ?> 本文
		</div>
<dl>
<dt><a href="<?php echo post_custom('imagefield1'); ?>" rel="lightbox" ><img src="<?php echo post_custom('imagefield1'); ?>" width="200" height="200" rel=”lightbox” alt="<?php the_title(); ?>" /></a></dt> 画像
 <dd>?php echo post_custom('textarea1'); ?></dd> テキストエリア
</dl>
※注意:lightboxで表示する場合、カスタムフィールドはURLで出力します。

Custom Field Gui Utilityを使えば通販サイトの制作にも便利ですね!
